Saturday, October 6, 2012

{Gearing Up...}

...for Kids Clothes Week Challenge hosted by elsie marlie that begins in just 2 short days.  This is a great way to join in with other people all over the world who are committing to sew for their kids (or grandkids, nieces, nephews, neighbor's kid) for at least 1 hour a day for a week.
 
 
I've been gathering piles of fabric, contemplating patterns and making lists of all the wonderful things I would love to make for my kiddo (and his cousins).  I'm trying to use up some of my fabric stash and hope to only have to buy a few little things to complete my projects.  So far my list is:

*  2 Black Cat Halloween costumes for my nieces
*  Slippers for Milo  -- drafting my own pattern using guidance from this tutorial from Made By Rae
*  Wool trousers fully lined with knit for Milo-- probably Heartbreaker Pants pattern from Sewing For Boys with a few
     modifications
*  Faux fur hat and mittens lined with fleece for my niece -- still need to find or make a pattern


*  Gray Microfleece footie pajamas for Milo -- drafted my own pattern
*  Gray knit with monsters footie pajamas for Milo -- my pattern
*  Blue puppy flannel pajamas for Milo -- Goodnight Sweetheart pattern from Sewing For Boys
*  Cotton-backed satin pajamas for my niece -- still contemplating a pattern


*  Hooded jacket for Milo upcycled from Men's Hoodie and a flannel shirt -- drafting my own pattern

 
Well that's kind of big list for one week so maybe I should get started now :0)

Friday, September 14, 2012

{Pauley's Pullover}

The September installment of the Sewing For Boys sew-along is Pauley's Pullover. 
Perfect for Fall, which should be coming around soon...I hope.
 
This skill level on this pattern is labeled "beginner" and I definately agree.  I was able to whip this out in about an hour from start to finish.
 
 I am determined to get my stash of fabric down to a more manageable size so I pulled some fabric from the rather large pile and got started. 


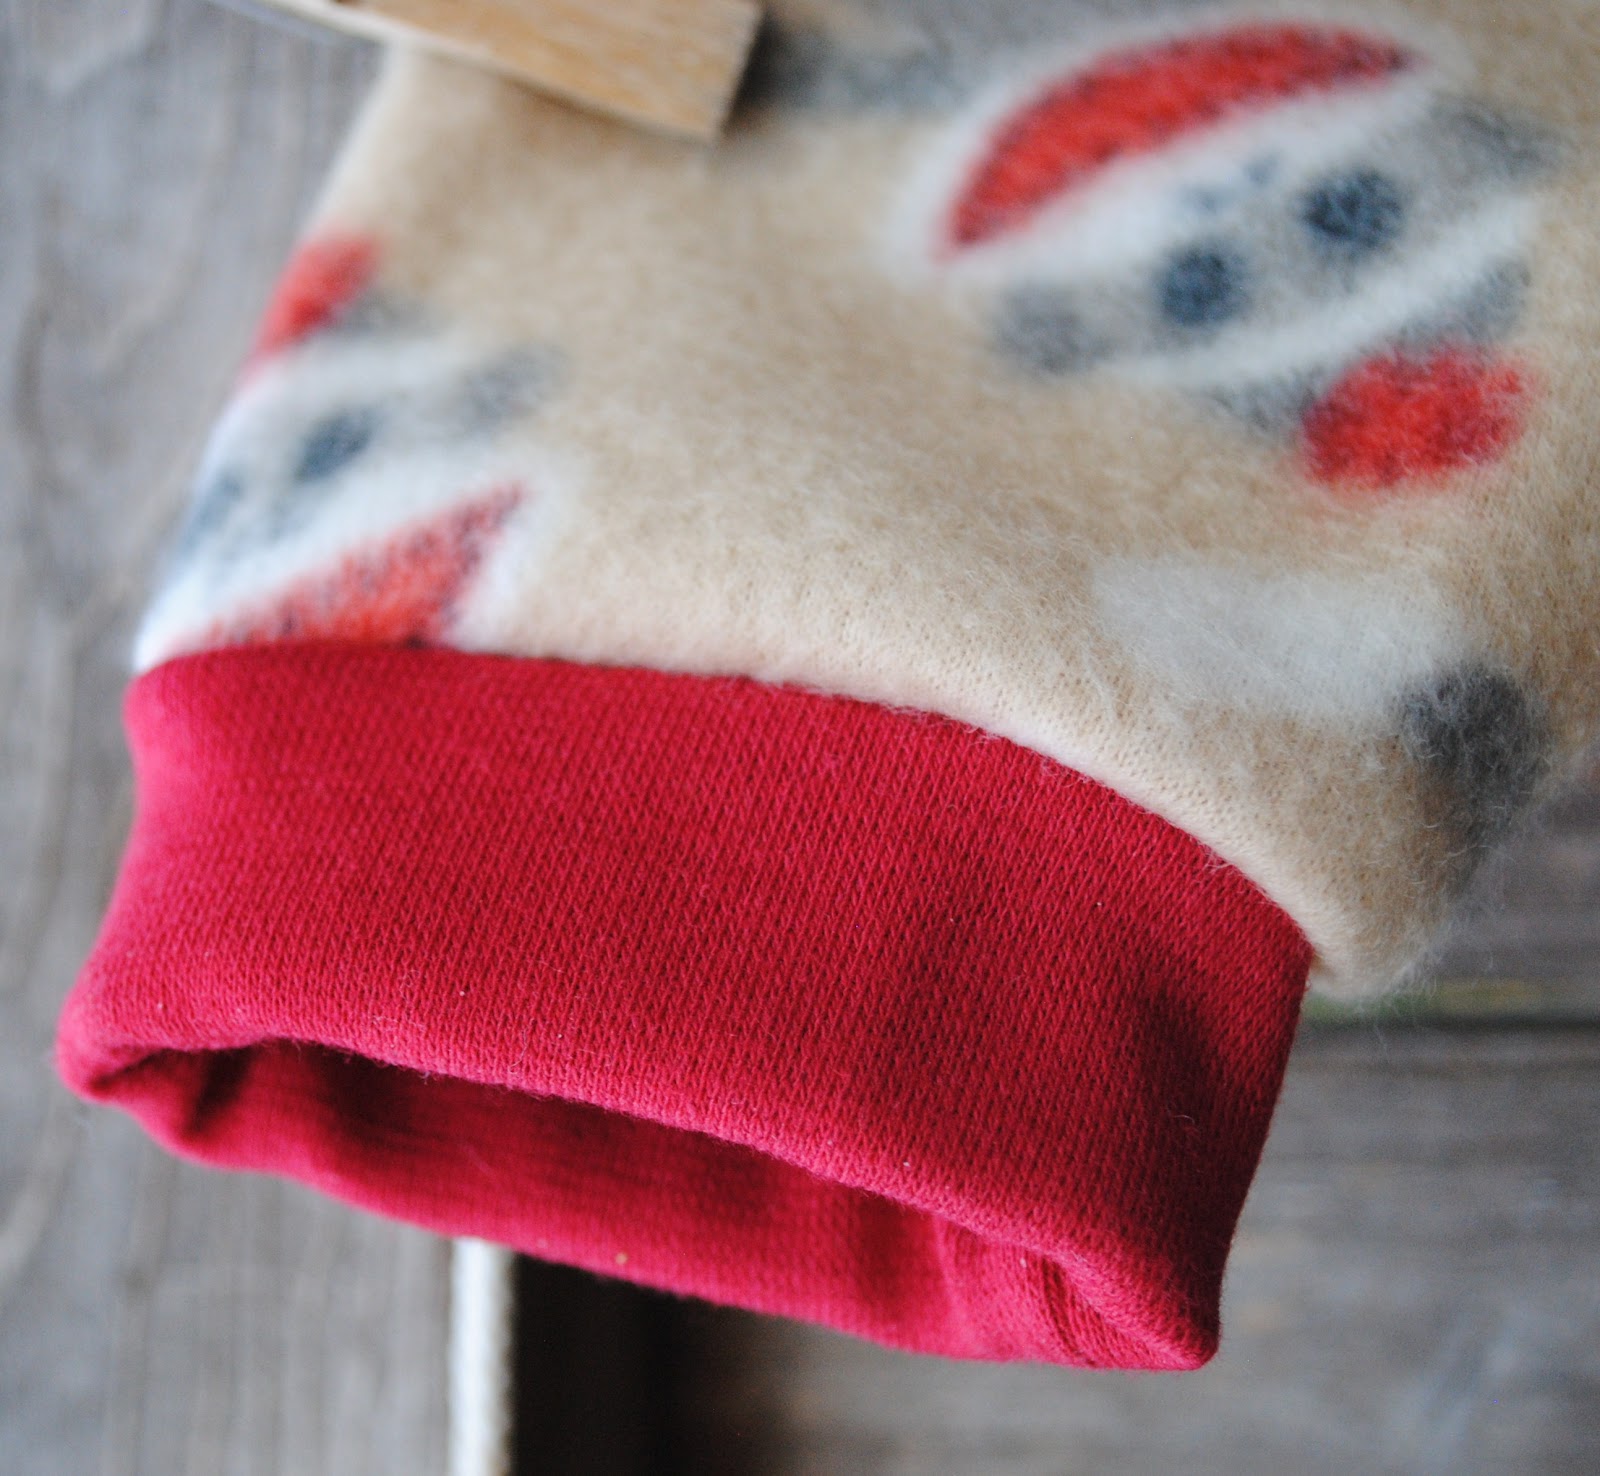
I found some soft and cute Sock Monkey fleece I had bought as a remnent.  It had a hole in it and was only 1/2 yard but the pattern called for 7/8 yard.  I traced out the pattern (size 2/3) and to my suprise I was able to get the front, back and both sleeves cut out even having to dodge the hole.  I also managed to get a little extra length on the front and back. 
 
 
For the neck band I used a red rib knit.  I enjoyed making the v-neck, it was much easier than I expected.  The only other things I have made with a v-neck are scrubs and it's a little trickier to get the point of the v to lay nicely.
 
Of course I had to change things up a bit.  Instead of making a casing and drawstring I added a 2 inch waist band made of red rib knit and inserted elastic in it.
 
 
This way I got a little more added length too. 
 
I did the same for the cuffs on the sleeves. 
 
 
I really like how it turned out and I can't wait for some cooler weather. 
I'm dreaming of playing in the falling leaves and visiting the pumpkin farm!


Wednesday, September 5, 2012

{A Boy & His Train}

If there is one thing that Milo loves more than elephants, it's trains.  We have no less than 7 different train sets in our house and at any given time at least one is spread out on the floor. 

As Milo's 6th birthday is approaching I realized that his toddler room was ready for a make-over.  He came home from the hospital at 16 months old to his "fishy" room.  SO now that he is a big boy in Kindergarten I figure it's time for a change.  Milo and I had a conversation and the decision was TRAINS.  He needs a room he can grow with so I don't want a little boy train room for him, we need a big kid train room.  No Thomas painted on the wall, no Chuggington bedspread.  I have some ideas but it's a work in progress.  I've started a train board on Pinterest, you can find it HERE if you are interested.

One thing I know I want is photographs of real trains and all things railroad.  Labor Day weekend would provide the perfect time and setting.  Last week I wandered into an Osh*Kosh store and found the little blue/white stripe engineer pants on sale and I could not resist.  Perfect for train pictures, now what to pair with them?  I first went toward the obvious red shirt but then had a different idea.  I dug through my box of knit and found the perfect fabric.

Mustard yellow and navy blue rib knit

I used the great Flashback Skinny Tee pattern from Made By Rae. 


I love this pattern, it so versitile.  I made the short sleeve version with contrast neck and sleeve bands for a ringer tee look.   For the hem I just surged around the bottom with yellow thread.  I added some navy fabric paint and a freezer stencil of a steam train engine.  Painting on the rib knit gave a great effect because when the fabric bends at the ribs some of the yellow shows through and gives it a more vintage-ish look. 


The perfect photo shoot outfit was complete.
 

On Saturday I grabbed Milo and Grandma and we went out for a little photo fun.  I found the perfect setting on the train tracks near the edge of town where the train crosses the Rio Grande River.  There also happens to be a train yard too.  I was able to get some great pictures of Milo and the train tracks to use in his big boy room.

 
After Milo's pictures were done he went with Grandma to throw rocks in the river while I ventured down to the train yard.  There may or may not have been a little trespassing going on :0)  I got some great pictures of all things train, from railroad tracks, to steam engines, to train axels, signs, and old rail road related buildings.


Tuesday, August 28, 2012

{Henry Shirt & More Elephants}

I'm a little behind getting this one posted!  The June patter in the Sewing For Boys sew-along was the Henry Shirt.  I was so excited to see that Stacy picked this shirt because I had just bought the perfect fabric I knew would make a fabulous Henry Shirt.  The fabric I used was from Ed Emberly's Happy Drawing line for Cloud 9 Fabrics.  On top of being cute it is 100% organic cotton and so soft to the touch.  I used the Elephant print for the front, back, yoke, collar and side pockets, Gray Scribbles for the side panels and inner yoke & Green Scribbles for under side of the collar.


I have learned many different techniques sewing the patterns from this book.  This shirt features a bias yoke.  I was a little confused at first but dug right in, followed the instructions and without much difficulty the shirt was done.  I love the side panels and the curved shape of the front panels.  The added top stitching just adds a more professional touch. 


The pattern calls for snaps or buttons.  I really liked the look of the snaps in the book photographs so I set out to find plastic snaps because the metal ones I've used before just wouldn't look quite right.  I ended up getting KAM snaps and they are SO easy to use, I want to use them on everything now.  I had a gift certificate on eBay so I headed there and found so many options.  The package purchased allowed me to get two different colors so I choose grey and green.  I decided that the gray snaps looked better but in the end added one green snap in the middle just to mix things up.  I also figured it would help my son get the snaps aligned correctly.


A note about the fit:  Like most patterns in this book this shirt tends to run wide. For my son (who wears a size 4 in commercially made shirts) I made the size 2/3 with the length of the 4/5 and could have easily added another inch or inch and a half to allow for growth.


 Luckily for us our local zoo was opening a brand new elephant/Asian animal exhibit this summer.  Milo loves the elephants but 2 who had been at the zoo for decades had been off display for the prior 6 months to get used to their new home and new elephant friends.  Decked out in his new elephant shirt we went on opening day to say 'Hi' to our old friends Mimi & Dolly and check out the new guys as well.

After finishing the Henry Shirt I had quite a bit of left over fabric and because it was a bit more expensive than I normally pay I was determined to use it all. I ended up making a pair of treasure pocket pants...


I made a matching Gone Fishing Hat..


I also made a flashback skinny tee (from Made By Rae) in white knit with green collar and sleeve binding that I freezer paper stenciled the elephants on...
 

Lastly, I made a pair of Made's basic shorts with a stenciled elephant.
 
 
A cute little elephant wardrobe inspired by son's love of elephants and my love of matching kids clothes (I've been ruined inspired by Gymboree).


Sunday, August 26, 2012

{Heartbreaker Pants}

July's Sew Along pattern was the Little Heartbreaker Pants.  I know I'm behind on posting this one but the pants turned out too cute to not post about them.
 
 
This one was an easy one!  I had a pair of Heartbreaker Pants that I had started last Christmas in a black corduroy but ended up abandoning them half done when I realized how much too big they were going to be.  When I the pattern was announced in July I dug through the project pile determined to not only finish them but give them a little extra pizazz too.  The pants now fit my little guy in length just about perfect however the waist is still quite big.  The feature of this pattern that I liked the most was adding an adjustable waistband.  The perfect solution for a skinny kid :0)

The pocket lining is a black cotton print that match the suspenders I made him last Christmas and will still work perfectly with these pants too.  I decided to add some octagon shaped knee pads in a back and white hounds tooth corduroy to give them a little more personality. 

I love how they turned out.  I think paired with a nice bright lime green button down shirt and maybe those black suspenders from last year they will be just perfect for the Christmas card picture this year!

A Toe Tapping Good Time

Saturday, August 25, 2012

{Luka Hoodie}

I've fallen behind in my post for the sew-along, hopefully I'll get caught up soon!
 
August's pattern for the Sewing For Boys Sew-Along is the Luka Hoodie.  The think the most fun part of making kid's clothes is choosing the fabric.  I've been holding onto this navy & white elephant fabric for a while now.  When I saw it on Etsy I knew Milo would love it but hadn't found the right project until now.  I paired it with some navy sweat shirt material that I already had.  The challange with having an almost 6 year old (who isn't much bigger than an average 3 year old) is using novelty fabric in a way that isn't too "little kid" anymore but still looks fun.  I love how it turned out!

 
Usually I make a size 2/3 in pattern from this book and add a bit of length but this time I decided to try the size 4/5.  The hoodie is definately big on him but I figure he can wear it for quite a while this way.  Choosing which fabric to use for each pattern piece was a bit of a challange because there are so many possible combinations.  I traced out the pattern pieces and then decided what fabric to cut each one out of to get the look I was going for.  The book refers to Main, Contrast, & Lining fabric but I just couldn't visualize it until I had all the pieces to look at.  Here is what I cut out of each fabric
Elephant Print Fabric:
1 Hood Back Panel
2 Hood Side Panels
Pocket
Secret Pocket Flap
 
Navy Sweat Shirt Fabric:
2 Top Front
Back
1 Hood Back Panel (used as lining)
2 Hood Side Panels (used as lining)
Bottom Front
2 Sleeves
 
Navy Flannel (lining):
2 Top Front
Back
Bottom Front
2 Sleeves
 
Yellow:
Secret Pocket


During the construction I added a few details.  First is adding some white piping between the upper and lower front portions.  I also did quite a bit of top-stitching in white to add a more finished look.   I also added a strip of the elephant print to the flannel (lining) sleeves so they could be turned up. The biggest challange was to use a zipper rather than button closures.  I will say that took a couple of attempts and plenty of seam-ripping but I am pleased with the out come.  The last detail was to add a casing at the bottom.  I used a small button hole to add some elastic cording and a cord stop.  The hoodie was quite wide on my son and this brought it in just enough to be more functional for him.


Even though it is still quite hot for August, I know this jacket will get plenty of use through the fall, winter and spring here in Colorado!

Monday, July 23, 2012

{Tracheostomy Treasure}

I can hardly believe that 3 years ago today my little boy started breathing without the assistance of a hole in his neck. 

 It was a big step that hardly seemed to phase him and today he knows why he has the scar on his neck but doesn't really remember having the trach.  He has been very interested in what he did as a baby though so we have been talking about how he was born and he was very sick and he stayed in the hospital for a long time. 


For many parents a trach is something that is feared, a last resort.  To me the trach was a life saver because without Milo would not have survived.  I welcomed it into our lives (I pushed the doctors to do it sooner rather than later) and was a bit apprehensive when it went away.  Life has been a little simpler for the last 3 years but I cherish this piece life saving medical technology.  I wanted to find a way to "honor" Milo's trach.  On the day his trach was removed one of the respiratory therapists at the hospital said I should bronze one of his trachs and honestly I looked into that but at $120 is was a bit cost prohibitive.  For a long time I pondered how to creativly and stylishly display a trach. 

***For those who are not familiar with trached kids I thought I should explain how I ended up with multiple trachs to use.  Tracheostomy tubes (trachs) are removed and replaced (very quickly) every week or two.  The old trach can be cleaned and sterilized.  We reuse the sterilized trachs a couple of times then I saved some for crafting later.***

Christmas 2009 I turned one of his old trachs into a Christmas ornament for a favorite nurse who was moving away.  While it turned out cute I wanted something I could display year round.  About a year and a half ago I finally came up a great idea.  I incorporated an old trach and a trach chain (that was never successful in keeping Milo's trach in) along with some charms, beads, and personalized charms.  I ended up with two different treasures. 

Milo Trach Treasure:

I selected silver square alphabet beads, a blue ball chain (like dog tags use) and colored metallic beads.  I found all of these at Hobby Lobby.


I cut the chain to an 8 inch length and layed out the design I wanted to use.  I then slid the beads onto the chain and threaded the chain through the flanges of the trach(where the trach ties go). 


The tricky part is balancing the weight of the beads to keep the trach from tipping forward. I tried gluing the chain to the cannula but hot glue wouldn't stick to the trach.  I ended up using a piece of  thread to tie the chain to the cannula.  If you look close you can see the knot beside the clasp. 


The finished product hanging on an ornament stand.


Placed on a bookshelf with the photo albums for all to see.


Believe Trach Treasure

I wanted this one to be a little more elaborate.  I used the trach chain that we tried to use with Milo's trach but it just couldn't keep the trach in my active boy.  The balls on this chain are bigger than the store bought one I used for the other treasure so I had a harder time finding beads but I ended up discovering the blue beads at Hobby Lobby, since then I have seen this style of bead at many different stores.  I also wanted to incorporate the date that he got the trach and the date his trach was removed.  I found an Etsy store that would custom make these rectangular pendants for a reasonable price.  I also got a round pendant with Milo's name from a different Etsy store.  I found a package of charms with a little boy and the word "Believe" that I knew I had to incorporate.


I decided to use the chain in the same length my son wore it and it turned out perfectly.  I chose a layout for all the beads and charms then threaded the chain through the trach's flanges.  To balance this one I found that if I placed one of the balls from the chain in the end of the cannula things balanced out just right.  You might have to play around with the chain to find the right balance based on what chain, beads, charms, etc you use. 
 
To hang put sewing thread or fishing line through the flanges and tie together.
The finished product:


This treasure is hanging in my bedroom. 
I had a set of cubes on the wall just waiting for something to fill them.  I attached a little clear Command to the inside top of the cube to suspend the trach in it's own little cubby.


I just love how both of these turned out.  Crafting with unusual items is always a challenge but the result can be extraordinary.  What unusual items have you turned into treasures?